Have you ever thought that why you get local ads on Facebook and Google? It’s because they track your real-time location with the help of your cell phones. Likewise, other important data on your phone, location data is a hot commodity for internet marketers today.

Almost all companies have a serious concern about your location. They access your location due to two main reasons. The first one is for marketing purposes or offering something special based on your specific location. For example, you need to share your location with dating sites for perfect matches.
And, the second reason is that some companies or organizations access your location for their own security purpose. For example, some companies want to share content with the audience of a specific region. They restrict the access of that data to outsiders. That’s why no outsider can access that specific data.
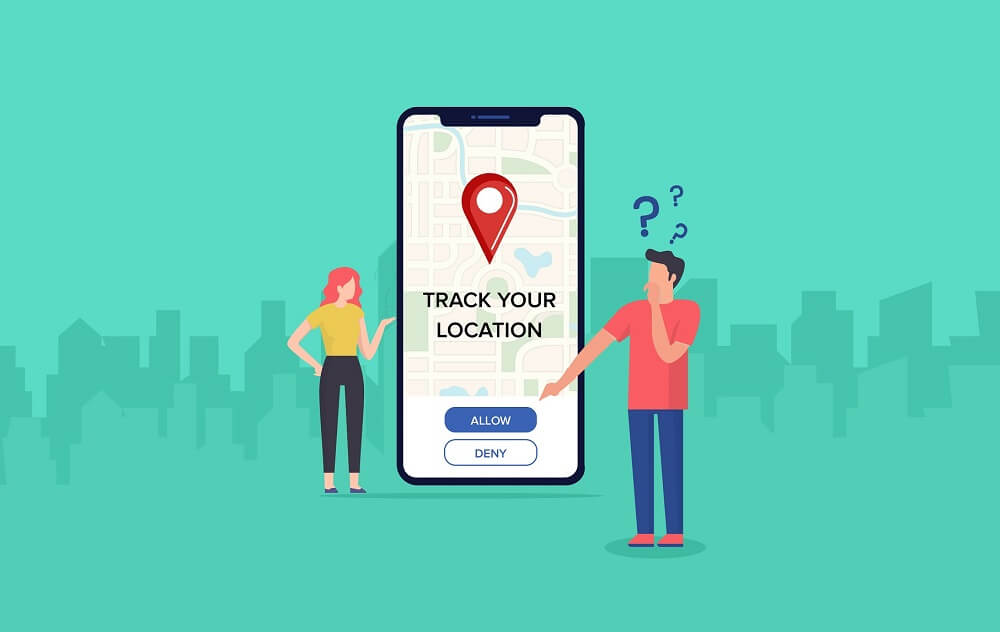
Apart from this, location-sharing is beneficial for all of us. For instance, parents can track their children’s location for their safety. However, protecting your privacy is never a bad idea. Sometimes, it becomes crucial to protect yourself from location tracking. In this article, we will talk about 5 methods to protect yourself from location tracking on iPhone. Before we move ahead, let’s first talk about the importance of keeping your location private…
Why Keep Your Location Data Private?
In this era, location privacy should be your top priority. Before we talk about different ways to stop someone to track your iPhone, let’s know the consequences of sharing your location…
Various apps like Find My Friends monitor your location information continuously. As a result, people in your contact list may be able to know your exact location. They can know when and where are you going. Most of the time, we are not comfortable sharing the particular places we have visited. Above all, it’s impossible to stop other people’s habit of asking questions about our visits.
You don’t know the intentions of people. Any person can take advantage of your location sharing. As a result, you may have to face a disastrous situation.
Many apps and websites on the internet use our location for proper working. Apple assures you to keep your data encrypted. However, trusting and taking technology for granted isn’t right.
Frequent notifications about your visited places from different apps can be very irritating.
Thus, it becomes essential for you to keep your location private to avoid such bothersome situations. Let’s now come to the main point of how to stop location tracking on iPhones…
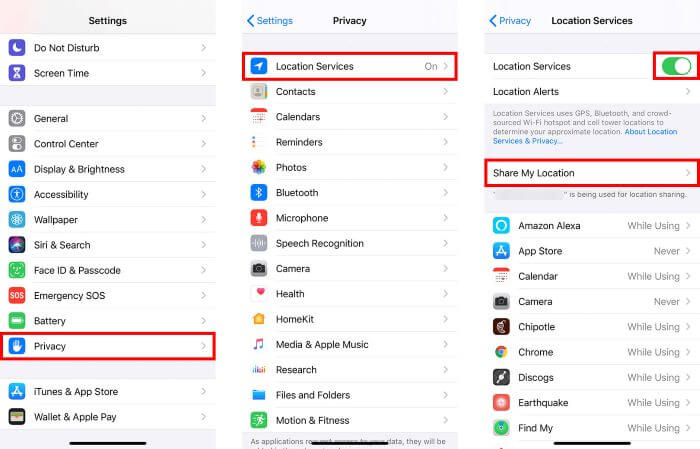
Method #1: Disable Your Location from Settings
The first and foremost way to protect yourself from location tracking is to turn off your location on iPhone Settings. In this way, you can completely deactivate the location services of iOS devices.
You don’t need to install any third-party app for this purpose. Plus, you don’t need any technical skills at all. All you need to toggle the location option in Settings.
Many apps like maps, Find My iPhone, or Find My Friends(change your location on it) track your location. After disabling your location from the Settings, the apps will no longer be able to track your location. Afterward, no one will be able to track your location.
Follow the steps below to disable your location on your iPhone completely:
- Take your iPhone and open Settings.
- Tap on the Privacy option.
- You will see the Location Services option there and tap on it.
- Slide the switch to turn the location off if it is on.

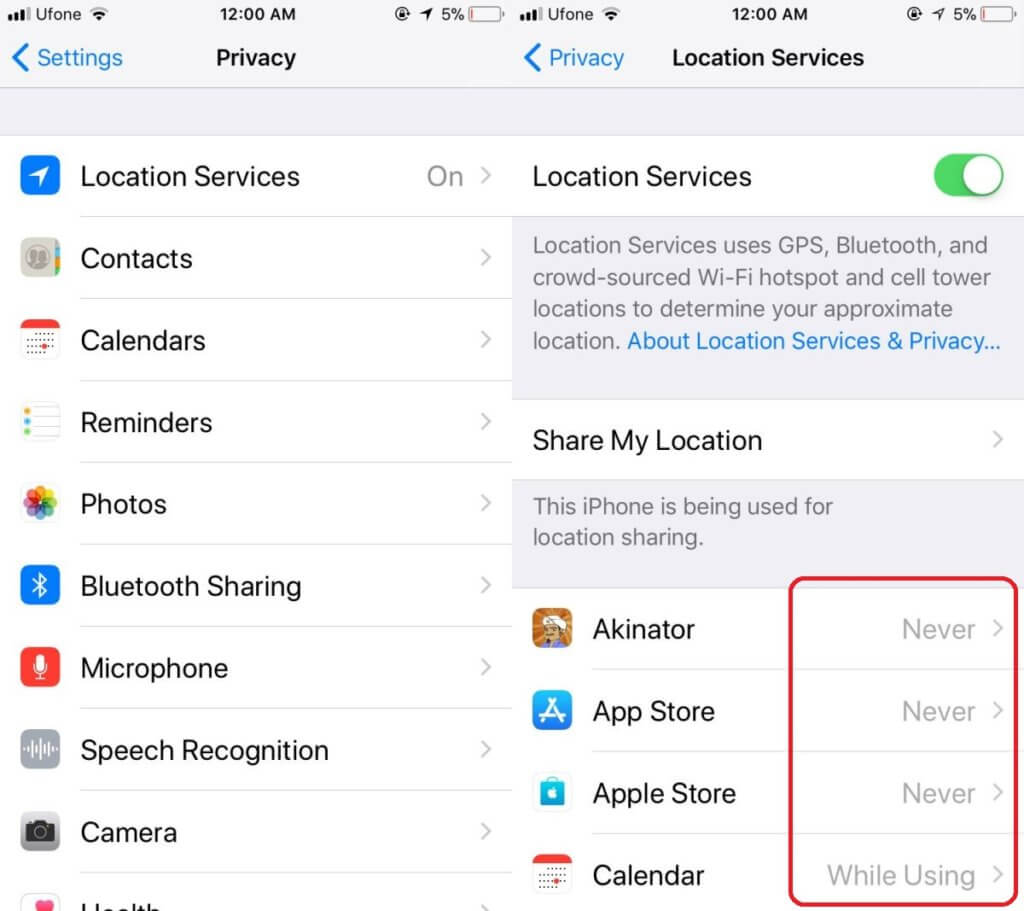
Method #2: Deny Location Permission to Specific App
In the aforementioned method, you have learned how to stop location tracking on iPhone entirely. It means if you disable location services from iPhone Settings, no app will be able to track your location information.
Some apps don’t work properly if you deny location permission. For example, you will grant location permission to maps for navigation purposes. That’s why you can’t deny location information to such apps for a better experience. Therefore, disabling the location services from Settings isn’t a good move.
Fortunately, you can deny location permission selectively to various apps. Follow the steps below to stop tracking on iPhone for specific apps:
- Open Settings and tap on the Privacy.
- Unlike the previous method, don’t toggle the Location Services off. Instead, you will see plenty of apps listed under the Location Services option.
- Select any of the apps to grant location permission according to your preferences. You have three options to choose from Never While Using the App, and Always.
If you choose the “Never” option, the app will never be able to use your location information. Further, if you choose the “While Using the App” option, the app will be able to access your location only while using. Similarly, when you choose the “Always” option, the app will continuously access your location.
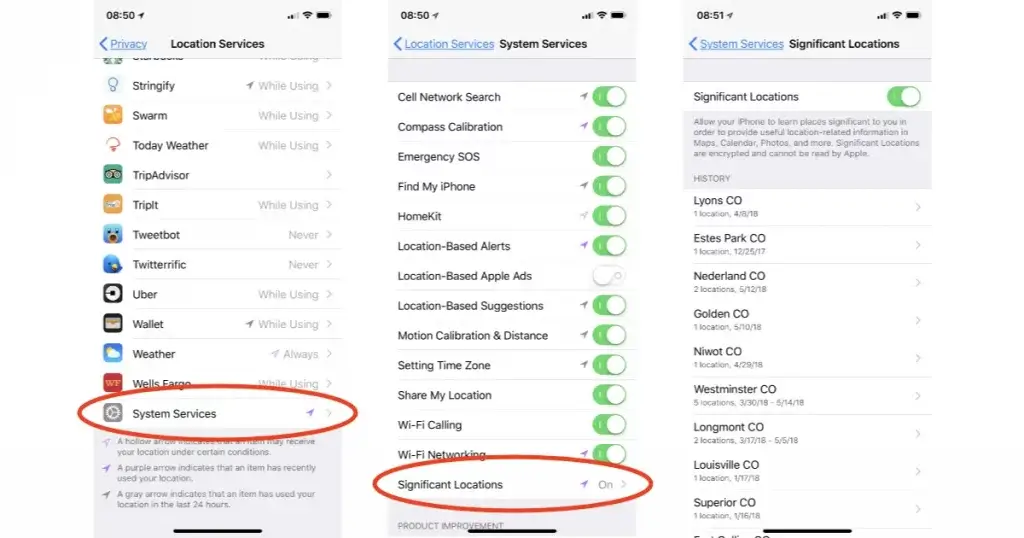
Method #3: Turn Off All Significant Locations on iPhone
Apart from different apps like maps, iPhone itself tracks your location when and where you travel. Significant locations are these frequently visited places. The main purpose of this monitoring is to provide location-based suggestions. To enhance your location-based safety, you can even stop your iPhone to track your location information. Follow the steps below to disable significant locations on iPhone:
- Go to the Settings app from the Home screen of your iPhone.
- Tap on the Privacy option and then select Location Services that you find at the top of the screen.
- At the bottom, you will see “System Services”. Tap on it.
- Tap on the “Significant Locations” option. You will have to use your password or Touch ID to access it.
- You will see a slide bar next to the “Significant Locations” option. Turn it off.
Turning off significant locations add an additional level of security to prevent location monitoring. You must do it if you have serious location concerns.
Method #4: Turn Off Share My Location Service on iPhone
All aforementioned methods are very helpful to protect yourself from location tracking on your iPhone. Share My Location is the most popular app that helps you to share your location-based information with your family and friends. You should stop it to track your location for your privacy.
Do you want to know how to stop your parents from tracking your iPhone? If so, turn this app off. Follow the steps below to turn off Share My Location services on iPhone:
- Open the “Settings” option as usual and tap on Privacy.
- You will see the Share My Location option in the middle of the screen. Tap on it.
- Turn off the slider that is next to Share My Location.
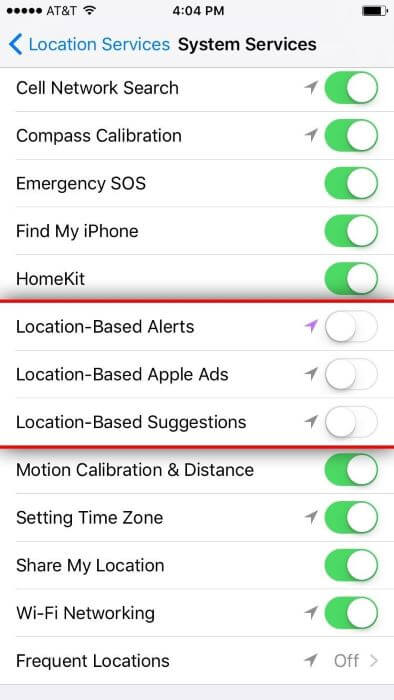
Method #5: Disable All Location-Based Alerts or Notifications
If you are an iPhone user, you will be already familiar with its location-based services. It offers three types of services i.e. alerts, Apple Ads, and suggestions. If these services or turn on, you will get notifications, iAds, and suggestions based on your location.
You can turn this feature off to stop that stuff. Follow the steps below to turn off tracking on iPhone in terms of location-based notifications, suggestions, and ads.
- Open Settings of your iPhone and tap on Privacy.
- Go to Location Services and tap on System Services.
- You can turn off location-based Apple ads, alerts, and suggestions.
Use FakeLoc to Protect Yourself From Location Tracking – Recommended
Many people consider turning off their location as the only solution to hide their location-based activities. Why not protect your privacy by misguiding others and have fun. How is it possible?
FakeLoc location changer app makes it possible for you. It’s the easiest and the safest method to protect yourself from location tracking. This app allows you to mock your location with just a single click. You can set your location wherever you want in the world.
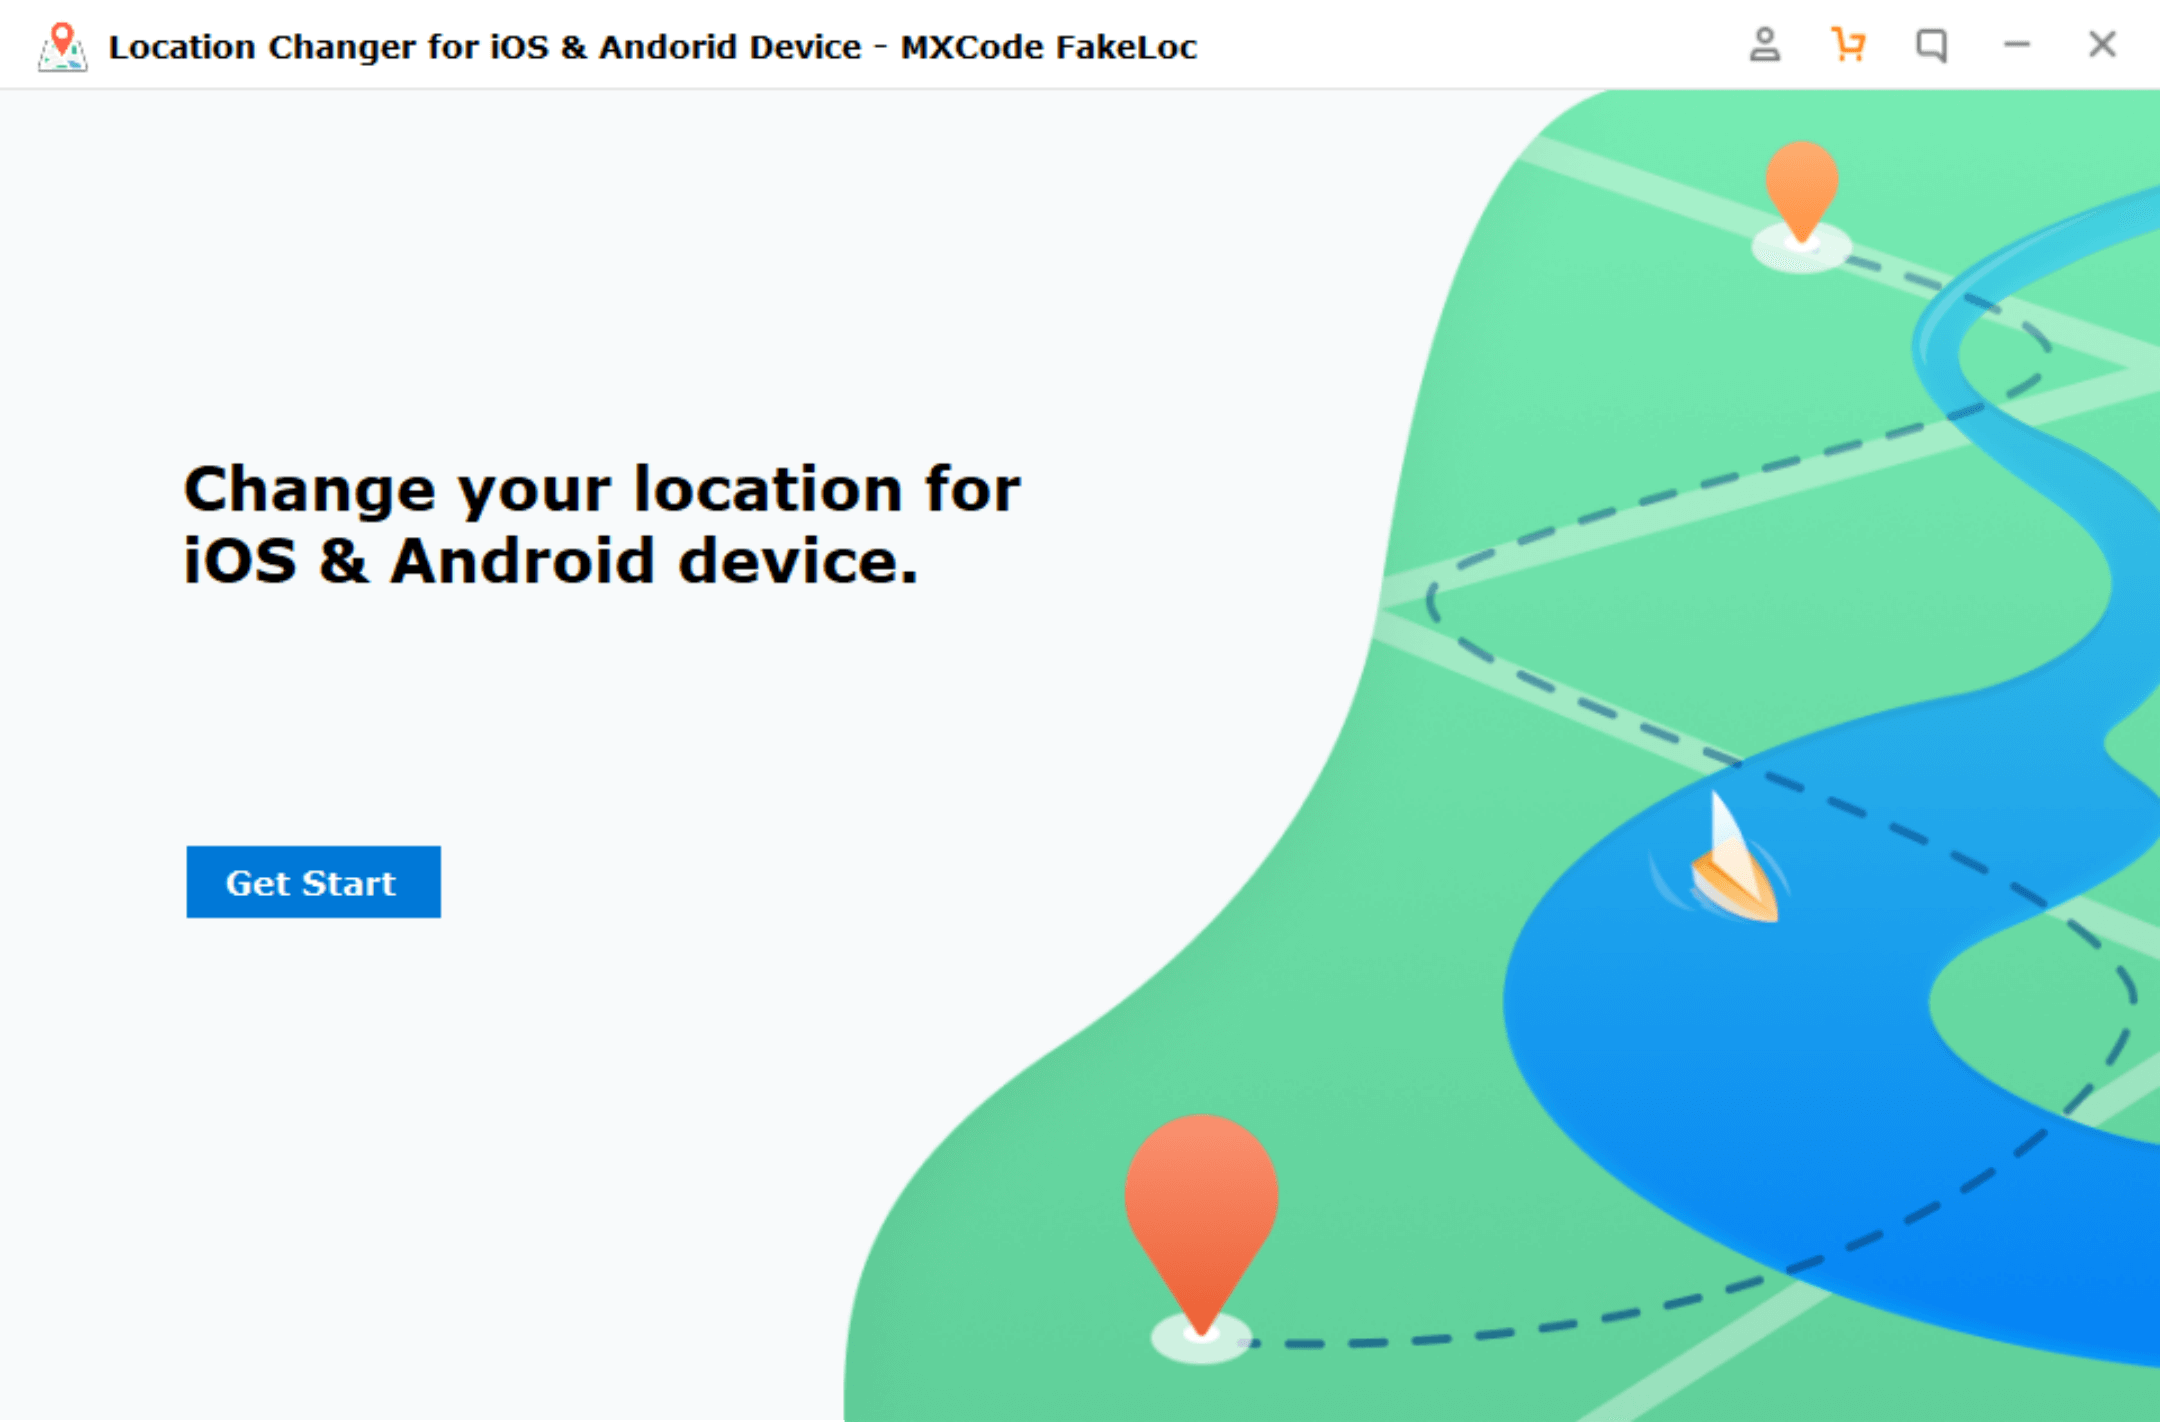
Follow the steps below to fake your location:
- Download and Install the app on your iPhone.
- After successful installation, run the app.
- Enter the desired coordinates to show your new location.
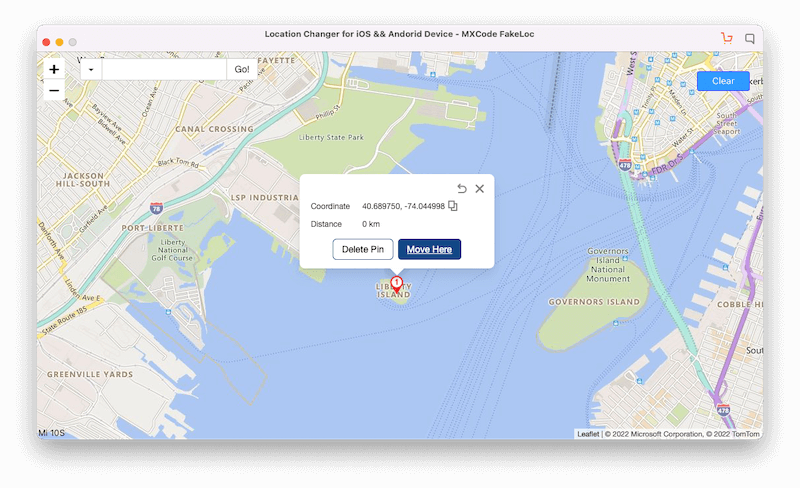
- You can also randomly select any spot on the map to mark your new location.
All apps will be getting the fake location set by the FakeLoc app. The app comes with a very intuitive user interface. You don’t need any technical skills to use this app.
Wrapping Up
All the above methods are 100% working and easy to follow. You can grant or deny location permission to any app based on your need. Or, you can simply turn the location off completely when you do not need it.
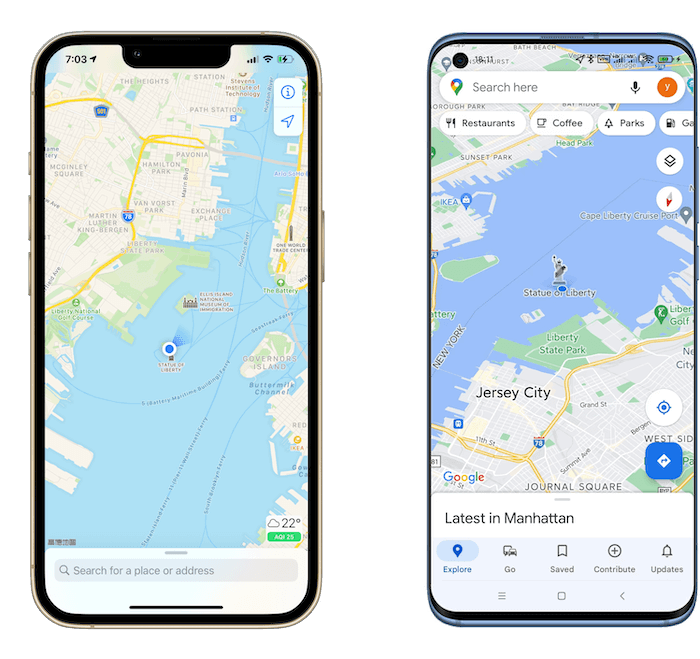
Instead of disabling your location, you can show your fake location to others to misguide them. Changing the current location is more beneficial than disabling your location. For example, sometimes, many companies grant access to specific data based on your location. A person outside that specific location can’t access that data. You can change your location to that specific location to access that data.
To alter your location, FakeLoc is the finest option for you. The app is available for all iOS devices and Android devices. Get this app to protect your privacy with a single click.