If you are using iPhone, you surely might be using the Safari browser for surfing the web. It doesn’t matter which of the browsers you are using, you will need Google at some point or the other. If you are searching for something, you will need a Google search. In the same way, Gmail and maps are also needed. The biggest problem with Google is that it takes your location. So, there should be a way to change location on Google for iPhone, right? Well, there is a great way to do so. The guide will cover the same thing.
By the end of the guide, you will have a clear idea of how you can change location on Google for iPhone. We will begin with the basics.
Why do You Need to Change Location on Google for iPhone?
For many people, it might not the most important thing. However, it is the most important thing that you need to keep in mind. We will talk about it here and give you a few reasons to change it.
Search Location
When you search for something on Google, you will see that the location is already added. When you scroll to the bottom of the search page, you will see the location of your device. This isn’t the exact accurate location but the area is surely the same. in this way, Google determines where you are located at.

So, how will this affect you? Well, the first thing in the search results. The results shown in Google are customized and personalized. So, if you are from the US, you will get different results. In the same way, if you are from the UK, you will have a different result. This especially applies to the people who are doing a local search.
If you are looking for the best café, Google will use your location to show the best café.

Google Maps
Sometimes, we just don’t want to reveal the exact location in Google Maps. The biggest problem here is that people can see the real-time location. So, if your Gmail account is with someone, they can know the exact location.
If you feel like you want to spoof the location of the maps, you can use this method to change location on Google for iPhone.
Google Saves Everything
Well, the biggest problem is that all the people who have access to your Gmail account will also be able to see the location and all the things you do in real-time. However, the next biggest problem is that Google saves every single thing.
So, in some cases, if someone opens the history or Google activity, they can see the exact history with the location. If you can stop the location reveal, you can save a lot of privacy. Therefore, people prefer not to show the location.
Apps Using Google Service
Google offers location services to other businesses. There are many apps and websites out there that use the same service like Google to determine your location. If you are visiting that website or that app, Google will track your location and then show it to them.
Many people don’t want this to happen. Therefore, they will use the apps that use Google services instead. You can use this method to change location on Google for iPhone
How to Change Location on Google for iPhone?
Now that you know that it’s important to change location on Google for iPhone, we will see how you can do it.
Well, we won’t make it too complex for you. Instead, we will make it simple and easy to understand.
You will have to install an app on your iPhone. It’s the app by MXCode called Fakeloc location changer. As the name says, it allows you to set up a fake location, and then you can pretend that you are in that location.
The best thing about the app is that you can fool every single app with this. It allows you to have a fake location in every single app. So, even if the app is using the default GPS service that comes with the iPhone, it will never know your exact location. You can still have a fake location for them.
With that being said, it’s pretty obvious that it can even spoof the location in all the Google apps. So, it doesn’t matter which app you are using, you can have a fake location that can’t be traced.
We will now have a quick look at the features and the advantages of using this app.
Features of Fakeloc Location Changer
Here are some of the top features that you need to keep in mind. We will also see the advantages here as the features. So, if there are good things about the app, you can expect them here. Let’s begin the feature list and see what cool things you will get here.
- To begin with, it doesn’t require jailbreak. You can use it directly on any iPhone device to change the location. As jailbreak is not required, we can say that it’s free to use.
- It’s also compatible with all the devices. It doesn’t matter which iPhone model you are using, you can start using the app and get all the advantages of it.
- You can spoof any location.
- There are two ways to add the location. You can add the coordinates or you can even pick it manually.
- For realistic simulation and spoofing of location, you can even move the joystick around and walk in the fake location if required. This will show that you are moving.
- You can use the same app on five devices. So, if you are planning to use it on more devices, this is the app for you.
Now that you have a clear idea about all the top features you will get here. We will now have a look at the steps on how you can change location on Google for iPhone. The steps are also simple and easy to follow. So, you can easily follow it and then change the location.
Steps to Change Location on Google for iPhone
We will now have a look at the steps to change location on Google for iPhone.
Step 1: Get the Fakeloc location changer App
The first step is to install the Fakeloc app. You can head over to MXCode and install the app from there on your Windows PC or Mac.

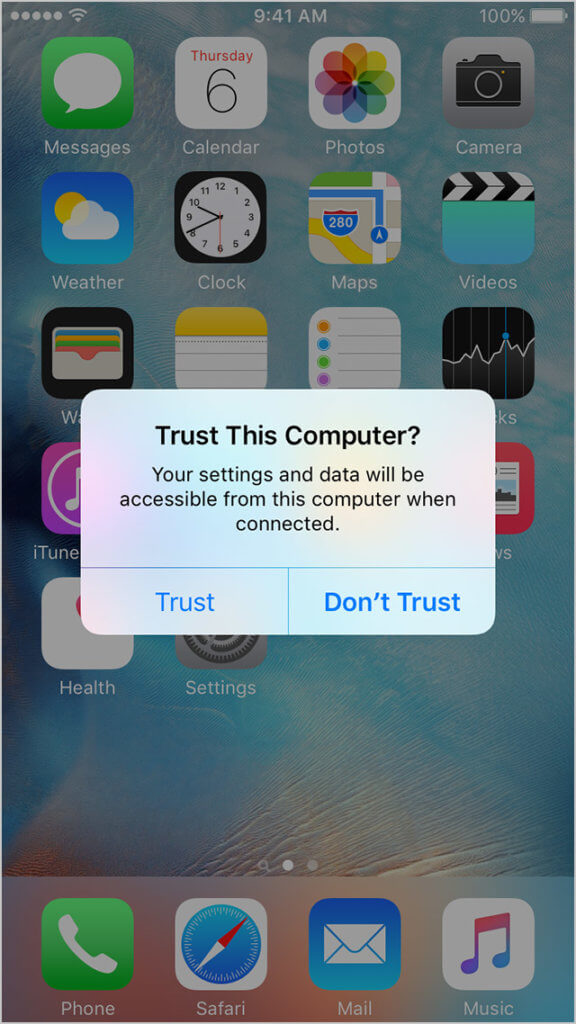
When you install the app, you will connect your iPhone to PC. It will not ask you for any permissions. But you have to confirm trusting your PC on your phone with a popup view. As we are changing the iPhone’s location, we will send the new location from your PC to your iPhone.

Therefore, you can allow all the permissions and then get started.
Step 2: Set the Location
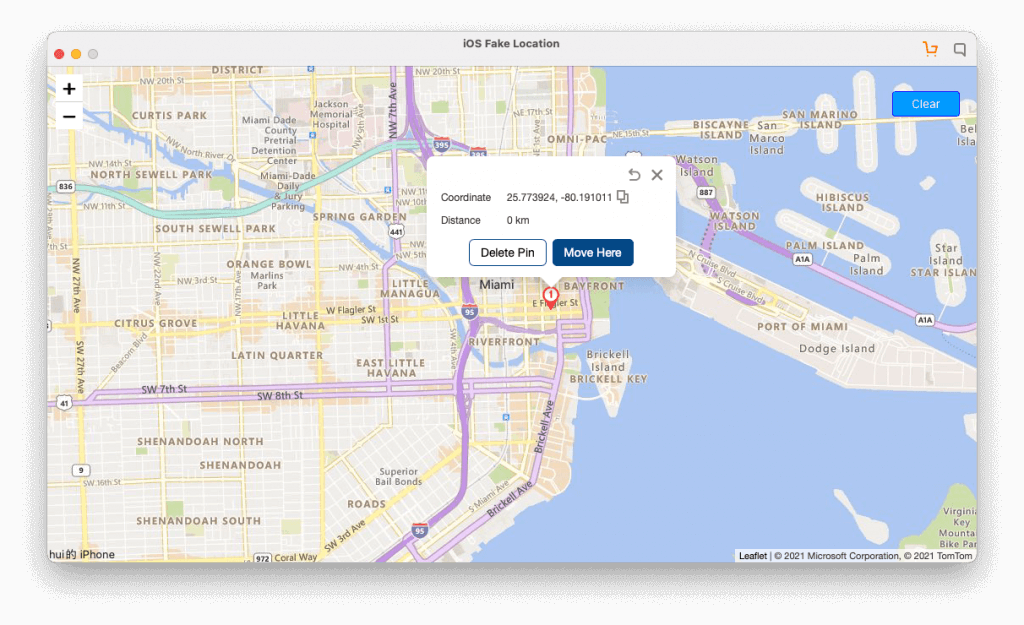
The next step is where you will have to set the location that you want to spoof. You can select your preferred location from the map by directly picking it up.
If you don’t want to do that, you also have another option here. Another option is to enter the coordinates. When you enter the exact coordinates, you will see the exact location. Thereafter, you will have to press the confirm button to set that location as your fake location.
When you do it, the Fakeloc app will use your entered location as your preferred location.

Step 3: Test Google Apps
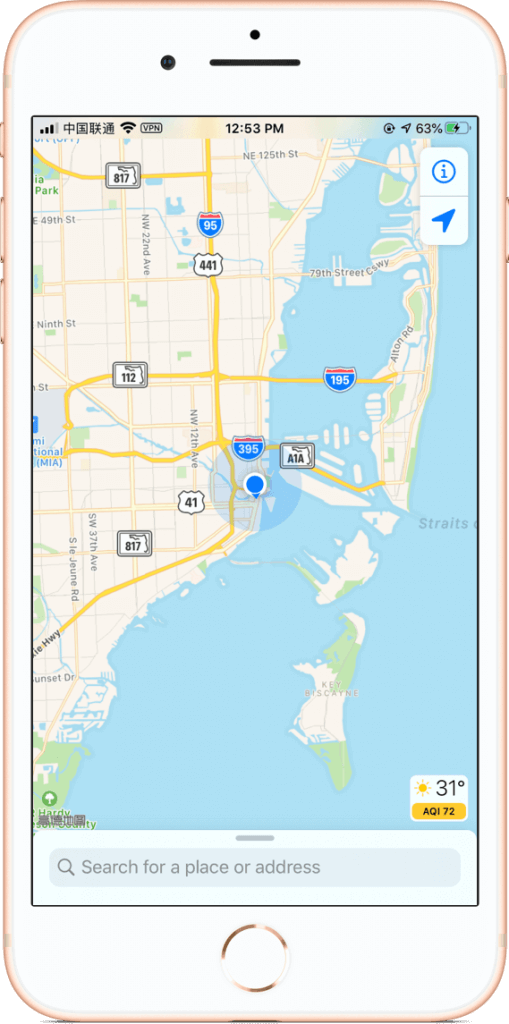
As we are changing location on Google for iPad and iPhone, it’s always recommended to check the app before you continue. You can open your Google app and see the location.
The best way to see the location here will be the Google search app and the maps app.
You can search for something on Google and you will see your exact location at the bottom of the page. If that’s the fake location you entered in MXCode’s Fakeloc app, you are good to go.
You can also check the same thing in other apps like Maps. When you have the confirmation that the fake location is being displayed there, you can proceed and start doing your work.
If for some reason, you don’t see the exact location, you can simply open the Fakeloc app again and then do the procedure. If you see the take location again, you will be able to see that the location is set.

Final Words
To conclude, this is how you can easily change location on Google for iPhone. When you use the Fakeloc app, it will not only change the location for Google but for all the other apps that you are using. So, we can say that the location of your entire iPhone will change. All the apps will use the same fake location that you have entered in the Fakeloc app.
If you want more information about the app or you want to know more features, you can surely visit the official website and check it all over there. All the information is displayed there. Thereafter, you can install the app from the official website.